Category: LIFE + STYLE

Keto for Beginners: A Quick and Easy Guide

If you’re reading this right now, there’s a chance you are just starting your keto journey, want to know more about keto so you can start, or are wondering what we have to say about this lifestyle.

Living a ketogenic lifestyle can sound intimidating or be confusing when you first start out, but it doesn’t have to be that way if do your research up front and keep it simple at the beginning. We always receive feedback from people that they are overwhelmed by the amount of things they can’t eat and don’t know how they could ever sustain cutting out so many of their beloved carbs. Our take is that instead of focusing on what you CAN’T eat, consider what you CAN eat and how you can work it into your daily routine.

Let’s just get the nitty gritty out of the way first.

What is ketogenic diet?

A ketogenic diet is a very low carb (20g net carbs per day), high fat way of eating in order to achieve the metabolic state of ketosis, which converts fat into ketones, which the body will use as a source of energy for the brain. It replaces the need to rely on carbohydrates for energy. The ketogenic way of eating has also been linked to lowering blood sugar and insulin levels – which can lead to multiple health benefits.

How are net carbs calculated?

According to Healthline, Net (digestible) carbs are broken down into individual sugar units and absorbed into your bloodstream. However, your body processes fiber and sugar alcohol carbs differently than digestible carbs.

How do you track net carbs?

Two very common apps to track macros and carbs are MyFitnessPal or Carb Manager. Once you get comfortable, it is also possible to eyeball and intuitively track them once you understand the average net or total carbs in foods you are eating on the regular. If you are just beginning, we recommend using an app until you truly feel comfortable with carb counting and staying within your daily targets.

Here are some recommendations on how to start eating a ketogenic diet:

  1. Talk to your healthcare provider to understand if this is the right lifestyle choice for you. This is optional but recommended as everyone’s bodies are different. What is safe for someone could be dangerous for another.
  2. Do your research. You NEED to do this. Whether that be googling articles like this one or talking to people who have experienced the keto lifestyle – you need to ask questions up front or else you are going to feel lost in a sea of opinions. Do you need to be a keto expert to start eating a ketogenic diet? No way! But you should know the basics such as how to count carbs, understand what ketosis is, common grocery items, and general foods/ingredients to avoid. Build a strong foundation for success.
  3. Get rid of the bad stuff. Donate the sugary, starchy, processed foods living in your fridge and pantry and don’t look back. Out of sight, out of mind. If the flamin’ hot cheetos are not staring you in the eye, you probably will not be tempted to eat them.
  4. Start upping your water intake. Carbs retain water. As you lower your carb intake, water will be flushed out at an increased rate, so you need to remember to maintain your fluid levels as your body transitions.
  5. Avoid the dreaded KETO FLU by adding electrolytes or increasing salt into your food. The keto flu can make you feel like a hot mess and wanting to quit after a few days. Don’t quit, just avoid the keto flu until your body is used to the lower carb intake.
  6. Figure out your targeted macros and/or net carbs you should be intaking each day. You can do this on ruled.me
  7. K.I.S.S. – KEEP IT SUPER SIMPLE! There are so many more keto-friendly or low carb products out on the market today, which is great, but that’s just more temptation and a lot of money to be spent. We love trying new products more than anything, but it’s easy to get caught in the hype when you first start and then you somehow end up with $500 worth of snacks. Start simple with whole foods and unprocessed foods and then work in the fun keto on the go items once you get your bearings straight. You need to know how to fend for yourself at any moment when these products are not available. Eggs, good fats like avocados, grass-fed butter, fatty meats, dark leafy greens are your friends. Start with them first.
  8. Find at least one support system whether it be a friend, family member, coworker, or even a stranger in the #ketocommunity on Instagram or Facebook. There will be times of frustration or stress and you want to be able to cope without turning to sugary or high carb foods.
  9. Give it a hot minute before you give up. It took some time for you to feel the way you do so it will take time to heal both inside and out. Just because you do not see the scale change or see or feel any different, it will take time. Try a few months before you throw in the towel.

So, now what?

Go to the grocery store and set yourself up for success. Have food ready to cook or grab on the go. Here is a sample meal plan:

Keto Meal Plan For 1 Week

To help get you started, here is a sample ketogenic diet meal plan for one week:

Monday

  • Breakfast: Bacon, eggs and tomatoes.
  • Lunch: Chicken salad with olive oil and feta cheese.
  • Dinner: Salmon with asparagus cooked in butter.

Tuesday

  • Breakfast: Egg, tomato, basil and goat cheese omelet.
  • Lunch: Almond milk, peanut butter, cocoa powder and stevia milkshake.
  • Dinner: Meatballs, cheddar cheese and vegetables.

Wednesday

  • Breakfast: A ketogenic milkshake (try this or this).
  • Lunch: Shrimp salad with olive oil and avocado.
  • Dinner: Pork chops with Parmesan cheese, broccoli and salad.

Thursday

  • Breakfast: Omelet with avocado, salsa, peppers, onion and spices.
  • Lunch: A handful of nuts and celery sticks with guacamole and salsa.
  • Dinner: Chicken stuffed with pesto and cream cheese, along with vegetables.

Friday

  • Breakfast: Sugar-free yogurt with peanut butter, cocoa powder and stevia.
  • Lunch: Beef stir-fry cooked in coconut oil with vegetables.
  • Dinner: Bun-less burger with bacon, egg and cheese.

Saturday

  • Breakfast: Ham and cheese omelet with vegetables.
  • Lunch: Ham and cheese slices with nuts.
  • Dinner: White fish, egg and spinach cooked in coconut oil.

Sunday

  • Breakfast: Fried eggs with bacon and mushrooms.
  • Lunch: Burger with salsa, cheese and guacamole.
  • Dinner: Steak and eggs with a side salad.

Always try to rotate the vegetables and meat over the long term, as each type provides different nutrients and health benefits. This meal plan was from Healthline.com, one of our favorite resources for all things keto.

Morning Skincare Routine

We have a lot of people inquiring about our skincare routine and complimenting on our skin (thank you) so I thought it be easier to have everything I use in one post. 

I use to have 1000 products in my routine thinking it will guarantee good skin but once I paid attention to the quality of ingredients I eliminated all of the unnecessary steps. I also was applying things in the wrong order…oops but hey, my failures are learning lessons for your success.

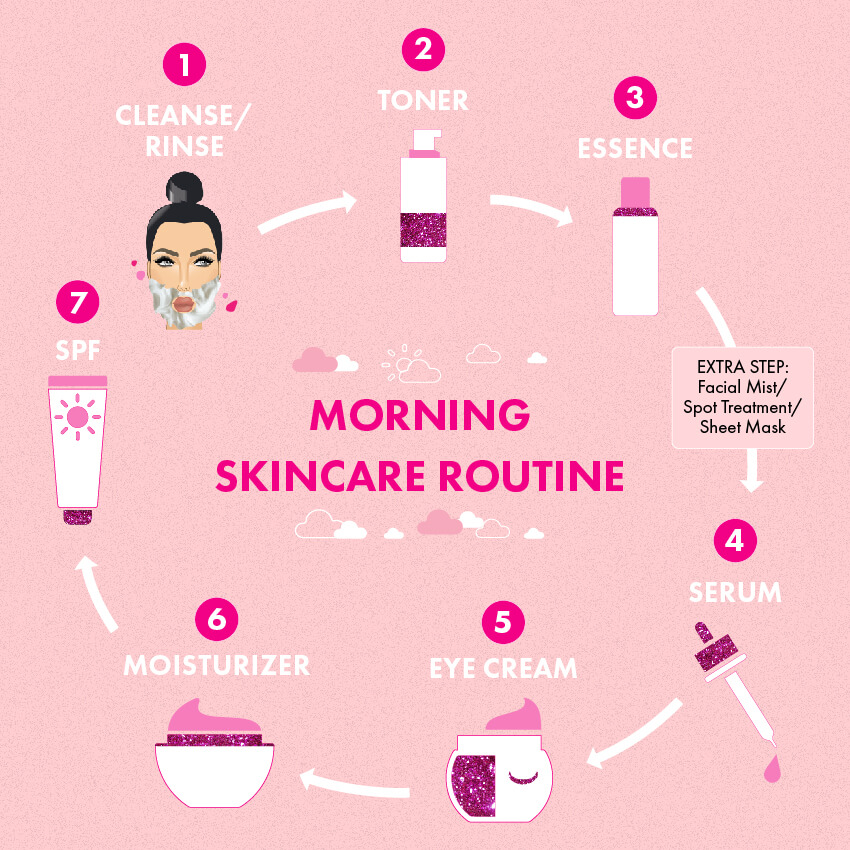
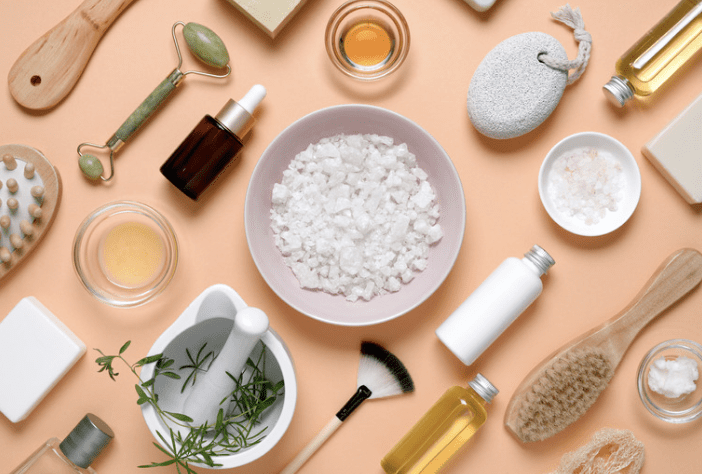
Here is a nice diagram I found online on the basic steps on how to layer your products and what you need.

I try to be consistent with both AM/PM routines but ya know my laziness gets the best of me sometimes. If I happen to fall asleep in my makeup (huge NO-NO) I would add double cleansing in the morning.

If I followed my own directions the night before then this is my daily AM skincare routine: 

1. Cleanse/Rinse: I have dry skin so I do not use a cleanser in the morning. I wish I knew this tip sooner because I was essentially drying out my skin more by cleansing in AM/PM. Now, I gently rinse with warm water and pat dry.

2. Toner: I like to be efficient and having multi use products. Discovering  Laneige Cream Skin toner was a dream come true. I apply the toner on a cotton pad and wipe my face down. This feels amazing on the skin and doesn’t feel like I’m stripping my skin. 

3. Essence: After using Laneige Cream Skin toner , I honestly didn’t feel the need for using an essence which saves another step and money! But if you wanted to add one, I enjoyed FRESH Kombucha Antioxidant Facial Treatment Essence

4. Serums: Vitamin C is a must have ingredient in any serum you use. It helps with uneven skin tone, rough texture, fine lines, scars, and just gives you a GLOWWWW. I’m on my second bottle of La Roche-Posay Vitamin C Face Serum 

5. Eye Cream: This step is also unnecessary if you use a good moisturizer but because my skin is dryer than the desert I like applying eye cream during the day. I gently pat in Kiehl’s Avocado Eye treatment under my eyes, on my eyelids, and on my laugh lines. You just need a tiny amount and applying this gives my Vitamin C serum time to soak in.

6. Moisturizer: My moisturizer graveyard is ridiculous and shameful. I have purchased and tried out so many before I found my go-to ride or dies. I want something that gives me a hydrating glow, but not too glow-y that I look sweaty. Something that is richer in texture but doesn’t feel heavy on the skin. Thank you psoriasis for making me become a picky bish lol. My ride or dies for the past 2 years: Tatcha The Dewy Skin Cream and La Mer Moisturizing Soft Cream 

7. SPF!!!!!!!! If I could only choose one morning skincare product it would be SPF. Without using SPF the rest of the products are pointless. You need SPF even if you’re driving to the store quick. Get into the habit of applying SPF in the morning like how you brush your teeth. SPF is essential to protect your skin, prevent wrinkles, sun damage, etc. We are spending all of this time and money on skincare products but if you don’t wear SPF you are just wasting your efforts. 

I had a hard time finding SPF products that wouldn’t irritate my psoriasis on my face, even the “sensitive” ones would sting my skin.  It has also been hard finding a sunscreen that didn’t effect my makeup foundation color. Currently, i’m on my third bottle of Krave Beauty- The Beet Shield and never looked back. I love how it moisturizes the skin, truly is undetectable, and DOESN’T STING. I apply a generous amount to my face and use what I have leftover in my palm to rub in my neck, chest and hands.  For my no makeup days I also love Glowscreen Sunscreen to protect my skin and give me that fresh faced look . 

8. Bonus: Once a week I shave my face (weird, I know) and exfoliate my face and body. I use this Women’s Disposable Razor to shave my hairy face. This helps brighten up my complexion and remove texture to keep my makeup looking smooth. I use to wax but it was ummmmm painful. Shaving is painless, cost effective and way easier. 

Then I exfoliate my body with Smoothie Star Breakfast Scrub and use ExfoliKate for my face. 


Amazon Activewear Haul

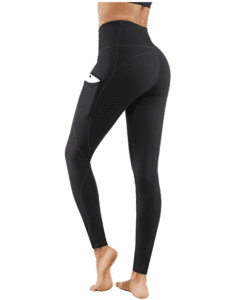
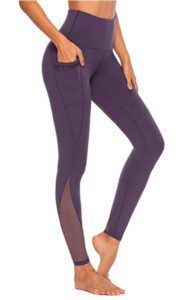
Okay, y’all know i’m trying to be better on accepting my body at all phases along this wellness journey. I’ve been holding off buying new leggings for so long that my current collection was literally holding on by a thread. 

I found myself searching on Amazon for some new activewear and came across a bunch of listings for an affordable price! 

Here’s my review on what I purchased. For reference I usually wear a size 12 for pants and I’m 5’6.5…(yes that .5 counts LOL)


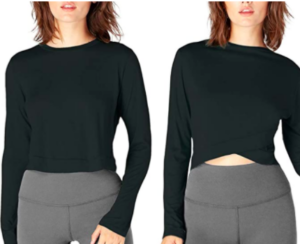
Long sleeve crop top: I freaking love the fabric of this top! It’s surprisingly very cooling and you can wear it in two ways. I ordered it in a size large and felt it was true to size. 

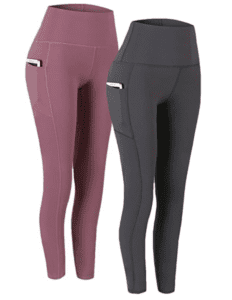
These leggings felt like butterrrrr on the skin and was easy to slide on and off. You get two leggings for the price of one! Crazy deal with a lot of color combos. I got mine in the grey and pink and it looked smooth on places my cellulite would typically show. I ordered this in a size large and it fit my hips and thighs perfectly but I had to keep pulling it up around the waist area. I usually have this issue with high waisted bottoms because of my measurements but it wasn’t annoying and I will continue to wear them. 

These are a must have for a basic black legging. I love the designs of the seams and it is not see through! Winning! The fabric also felt very breathable and was true to size for my usual “large”. 

Okay, these took a second…or two…to put on but out of all of the leggings this had the best tummy control and stayed fitted on my waist. I got this in purple and it has a cute mesh design on the calves.

Guide to Hot Pot & KBBQ Grill’n

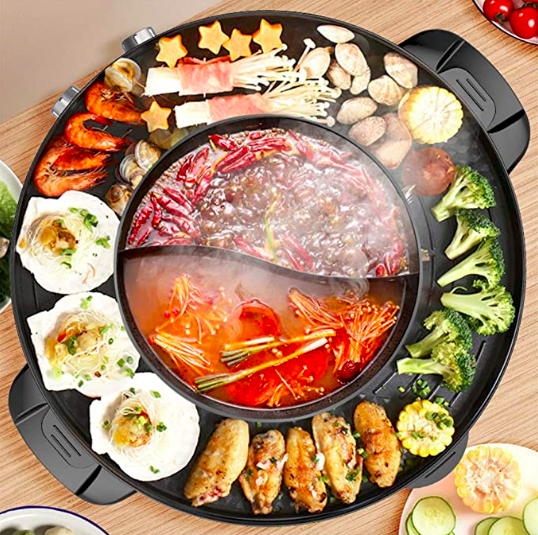
If you watch our instagram stories you know we love eating hot pot/bbq and YESSS, it can be keto. Most of the time Hot Pot & KBBQ would be cooked using two separate appliances but now with this awesome 2-in-1 gadget, we can have the best of both worlds in one sitting.

Since we get so many messages when we post about it in Instagram stories we figured a blog post was NECESSARY lol so here’s an overview with some tips n tricks. 


What is it? 

Both hot pot and kbbq grill is a dining experience that you can have with your friends and family in the comfort of your own home. You cook thinly sliced meats, vegetables, and low carb noodles via broth or griddle. Once it’s cooked to your liking, you can dip it in your sauce of choice and enjoy till you are stuffed and can’t breathe. Just kidding…or am I? 

Your spread can be as extreme or simple as you want. The beauty of this way of eating is that you literally have endless options that can fit your keto/low carb needs and the carbies in your life without having to adjust too much or making a separate meal.

Low carb Hot Pot

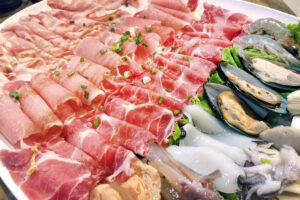
Protein: Thinly sliced beef brisket, pork belly, and ribeye is my fav. Along with beef (pho) meatballs and fish meatballs. Most of these items can be found in an Asian Market. Since we moved to Cali we enjoy going to Hmart to find these goodies. Hmart has a large variety of meat fresh/frozen and basically all the essentials you need. 

Vegetables: Watercress, spinach, straw mushrooms, enoki mushrooms, and seafood mushrooms are delicious and fulfilling. 

Noodles: If I want to throw noodles in the mix, I use “Healthy Noodles” from Costco. Find the scoop on these noodles here > Healthy Noodles

The carbies in my life enjoy vermicelli or rice noodles.

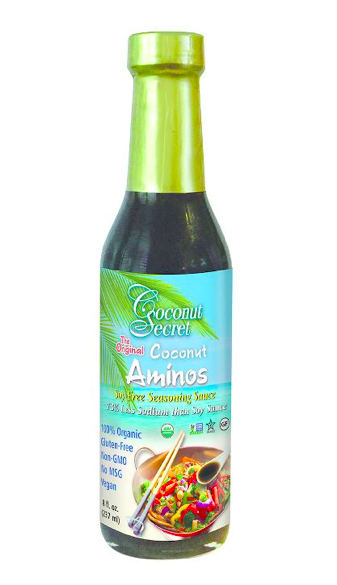
Dipping Sauce: This is definitely a personal preference. Spicy, sweet, salty, sour…it’s all up to you! My fav is spicy…of course. I start off with 1 tbsp soy sauce, 1 tbsp red wine vinegar, garlic, heaping scoop of hot oil, fresh Thai chili peppers, and cilantro. Try this brand if you want a clean version of soy sauce.

Hot Pot Broth: 

We prefer using pre-made bases because it’s simple and quick. Most of the pre-made bases are a bit dirtyyyy keto but we are okay with it. If you prefer, make any of your favorite flavored broth as your base to dip. Thai Tom Yum, pork, or beef broth are some other popular bases. Here’s the pre made base we like. 

Low Carb KBBQ

Protein: Similar to hot pot, thinly sliced beef brisket, pork belly, and ribeye won’t do you wrong. Usually I stick with the non marinated meat at home and kbbq restaurants since I enjoy the flavor in the sauce and the taste of the grill. But if you like marinated meat check out  our recipe. >> Keto-Friendly Beet Bulgogi

Vegetables: I prefer having the veggies in the hot pot broth vs kbbq but the fam likes grilled white onions, mushrooms, jalapeños, kimchi, and salad. Here’s our recipe for a Keto Korean BBQ inspired salad. 

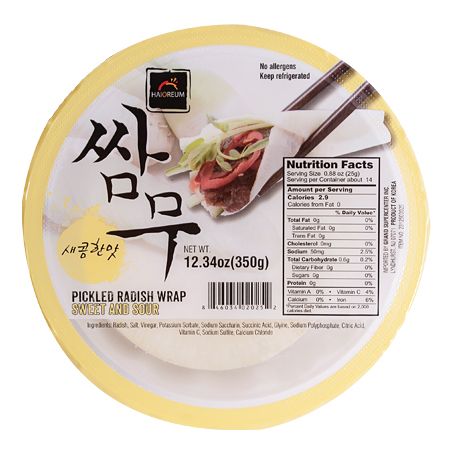
I do like to use thinly sliced pickled radish to wrap the meat in though with fresh jalapeños. Pickled radish wraps are a not a substitute for rice paper but it’s a great alternative to wrap your meat in. >> Pickled Radish Wraps

Noodles: I would do the same as hot pot and use healthy noodles. 

Dipping Sauce: For the kbbq grill I like to do sesame oil with a dash of salt or the same concoction as hot pot. 

Griddle: The griddle is non-stick but adding butter to cook the non marinated meats is bombbb.

What you need:

Gadget: This is non stick and super easy to clean. After use I unplug the cord and drain all the grease to dispose of properly then rinse and scrub with a sponge just like a pan. Then I just dry with a paper towel and leave it on the table for the next round or store in the cabinet. 

Tongs: Use tongs or chopsticks to pick up the delicious meats and stay a safe distance from the griddle lol 

Strainer: Not necessary but great to have for hotpot so you can retrieve your meats and veggies easier if you don’t want additional broth.


Keto Ice Cream Base

Y’all, I recently purchased this Pint Ice Cream Maker and I’m in love. It’s the perfect portion for David and I to share some ice cream when we get cravings and I love the texture – it’s like a soft serve and it’s sooooo good. We used to have a huge cuisinart ice cream maker but this one is just the right size.

Here’s a recipe for a super simple ice cream base. You can be creative and add all types of extracts and colors to the mix. Whatever your liquid tastes like is what your ice cream will taste like – so make it your own!

Keto Vanilla Ice Cream

So simple but delicious.

Prep Time: 2 minutes
Cook Time: 20 minutes
Chill time: 25 minutes
Course: Dessert
Cuisine: American
Servings: 2 people
Net Carbs: 5g

Equipment

Pint Ice Cream Maker

Ingredients

  • 2/3 cup heavy cream
  • 1/3 cup milk of choice (we used whole milk but you could use half and half, oat milk, almond milk, coconut milk, etc)
  • 1.5 tbsp Powdered swerve (more to taste)
  • 1/2 tsp vanilla extract
  • pink salt (just a dash)

Instructions

  • Mix all of the ingredients together to form a liquid base. Mix until the liquid is smooth.
  • Place the liquid base into the freezer for about 20 minutes.
  • Slowly pour the liquid base into the frozen base of the ice cream maker.
  • Turn the motor paddle on and slowly lower it on top of the frozen base.
  • Let the ice cream churn for about 20 minutes.
  • Enjoy!

Nutrition

Calories: 302kcal | Carbohydrates: 5g | Protein: 3g | Fat: 31g | Sodium: 48mg | Sugar: 2g | Net Carbs: 5g

We only share products/services that we love. This post contains affiliate links, which means we may receive a commission for purchases made through our links.

Tried this recipe?Please leave a review below and tag us @TheKetodashians on IG!


iPad Pro Productivity

Ever since I received the iPad Pro and Apple pen, I have left my MacBook Air to collect dust. The iPad Pro has streamlined my work performance and decluttered my work bag so much, I swear my back pain came from carrying around 15lbs+ of paperwork everyday too. 

I also discovered “digital planning” and OMG, where has this been all of my life? Being able to create custom inserts, with folders, and endless amounts of digital notebooks has been life changing. The Apple Pen also allows me to still get the traditional feeling of writing (that I love) but also has an endless amount of pen styles, highlighters, colors etc all in one. 

After geeking about it hardcore on our IG stories we had tons of DM’s requesting more info so here are all my favs…

iPad Pro 12.9 256gb in Silver

target.com

You definitely do not need to get 256gb but I wanted to make sure I had enough space for all of my files. If you need more storage you can also pay a monthly subscription to apple to keep everything on a cloud.


Apple pen 

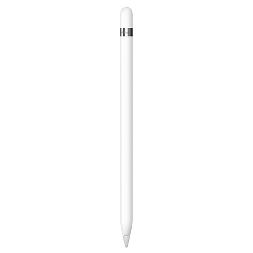
You can use either the 1st gen or 2nd gen with the new iPad Pro. The apple pen feels like a normal pen in your hand and my handwriting looks the same!


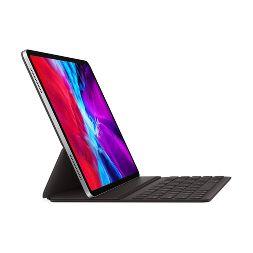
Apple Magic Keyboard 

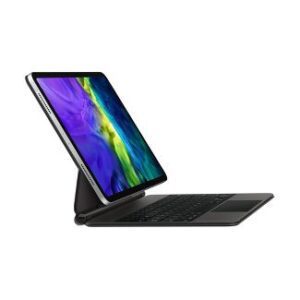
This keyboard was just released this year and it’s amazing. If you’re looking to replace your laptop, this is key because it also has a trackpad and the functions we love with a traditional mac keyboard. I love the simplicity of it and it’s very sturdy.


iPad Smart Keyboard no trackpad 

If you don’t care for the trackpad and are just looking for a keyboard case, this is a great alternative.


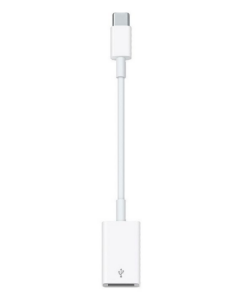
Apple USB-C to USB adapter 

Most of my files are located in an external hardrive, this adapter connects your usb to ipad so that you can still access your files. 

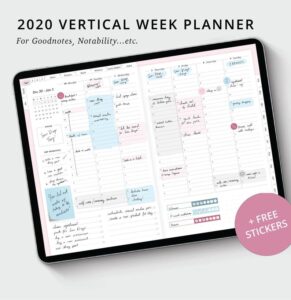
Digital planner

again…WHERE…HAS…THIS…BEEN…all my life? Lol i’m a planner addict but I was just wasting so much paper. Usually I would buy a few planners a year or create my own printables because I had different needs. The customization with digital planners is literally endless and way more efficient. I’m able to use ONE digital planner for every aspect of my life. 


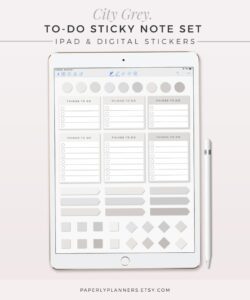
Digital stickers 

Of course now that my eyes are opened to a whole new world I found my next addiction…DIGITAL STICKERS. Adding a cute post it or bullet points just makes your day a little bit more fun 🙂


Olive Garden House Salad Review

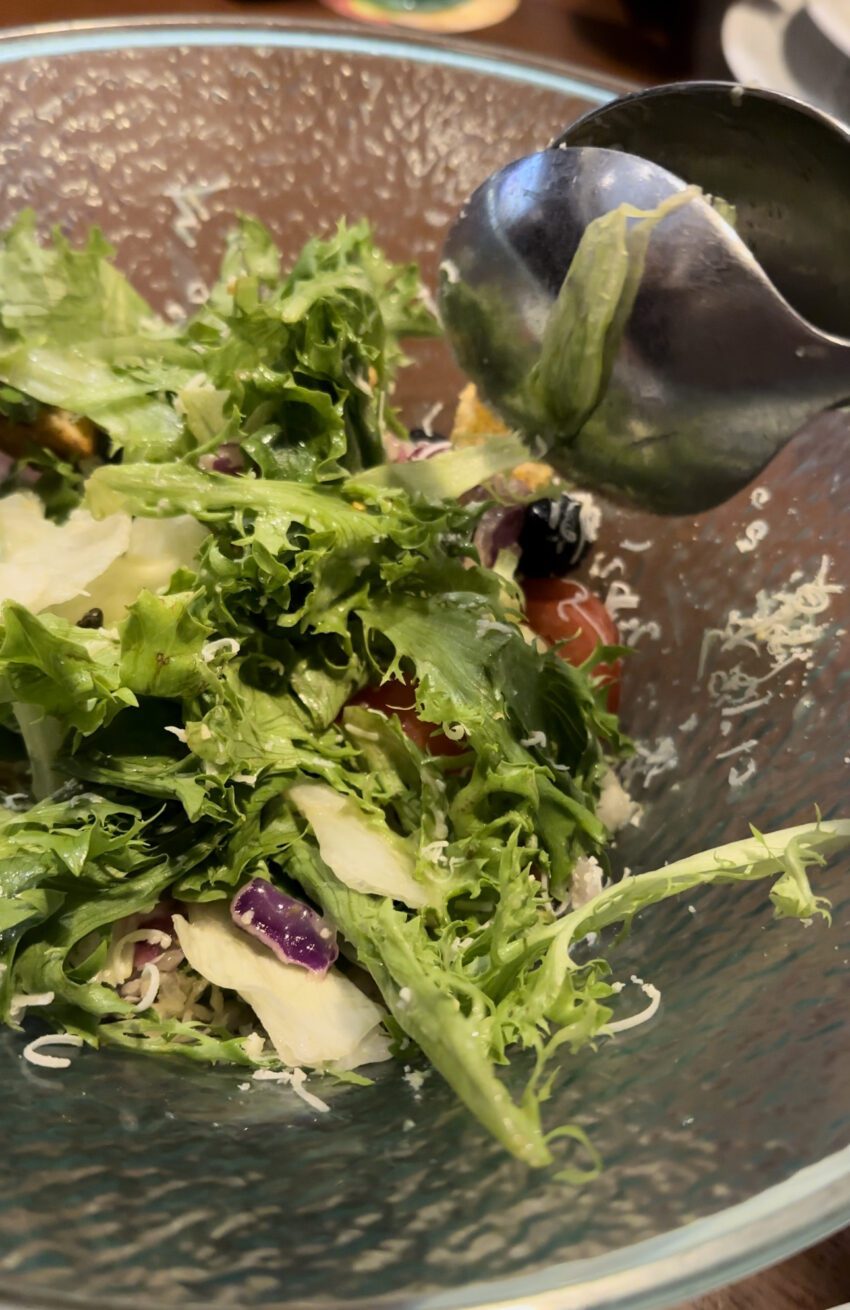
I went to the Olive Garden today and was served this unlimited house salad with field greens instead of iceberg lettuce. I liked the taste of it but the texture threw me off because I was expecting the classic American mix. I am hoping this swap was temporary because there was a shortage at the restaurant because you can’t mess with a classic! Update: after some research – due to crop disease, 2020 aftermath, and supply and demand levels – it looks like there is a iceberg lettuce and romaine lettuce shortage. This is causing a huge price increase for stores/restaurants but is not affecting field greens – hence, new Olive Garden house salad for now!

@theketodashians

I’m not sure how I feel about this…thoughts??? #lowcarb #olivegarden #salad

♬ Pennies From Heaven – Remastered – Louis Prima

FAQ: “What do you do with your leftover fry oil?”

Well let me answer that question – something we get almost 20 times daily any time we feature a video of us frying food on our Instagram account.

Short answer: we save it and continue using it until it is too dark or gets cloudy.

Here’s the scoop…

Our families have always deep fried foods since before we can even remember. Back in the day, there would be a designated “frying pot” where the oil would sit until someone needed to fry something – nowadays, in our own homes, here is what we do:

  1. Let the oil cool completely.
  2. Place a mesh strainer at the mouth of a large jar and pour the oil in there. You want the big bits to get caught so it doesn’t end up floating around in the jar. The reason you want to strain the oil is so when you reuse the oil, it doesn’t make the oil darker than it needs to be. It also helps keep the oil tasting fresher (in our opinion).
  3. Close the jar and store at room temperature.
  4. We reuse the oil until it becomes a brown color but that is completely up to you. The darker the oil, the darker your food will look after you fry it, so just adjust the amount of times you reuse based on the color and preference you have.

Now some additional questions we know y’all are going to have:

  1. What kind of oil do you use? We like to use avocado oil because it is clean and has a high smoke point. Use what oil you can afford and are comfortable cooking with. Canola oil, peanut oil, and soybean oil are all oils we have fried with – they are just very processed.
  2. How many times do you re-use oil? Depending on what we fry, it’s 5-6 times. If we fry fish, the oil is dunzo because the smell and taste will not go away.
  3. What deep fryer do you recommend?

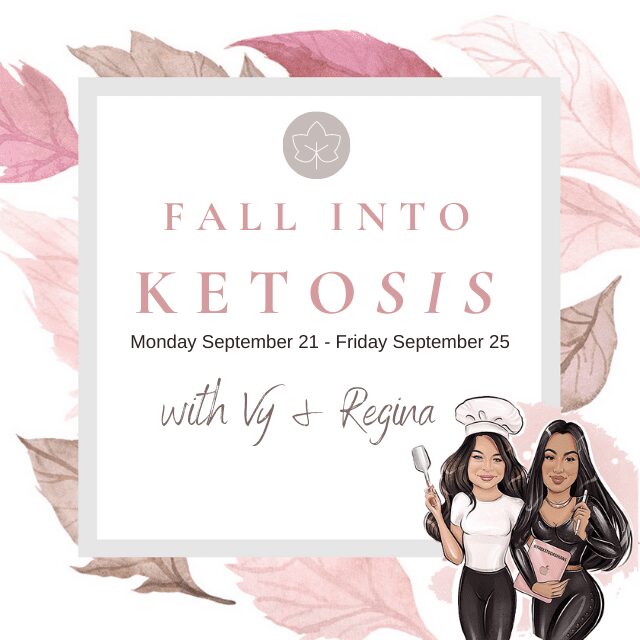
Fall into Ketosis Challenge

@theketodashians

New season, better habits! Join us to reset for fall! Daily updates on our instagram page 💕##learnontiktok ##keto ##lowcarb ##fallintoketosis ##easyketo

♬ You Got It – Vedo

W T F happened to Summer 2020?! With the official start of Fall commencing on Sept 22, we thought it would be fun to jump start the new season with a keto based health and wellness reset week starting on Monday, Sept 21st. This challenge will run from Sept 21- Sept 25th and will focus on total grams of carbs, upping your step game, and being better with your water intake.

The guidelines are simple:

  1. Stick to 20g TOTAL carbs or fewer. That means DO NOT SUBTRACT ANY FIBER to get to 20g of total carbs. This also means you will be depending on very low carb foods to get you through the week instead of many processed foods with added fiber or sugar alcohols. This is a great way to refocus your low carb intake and challenge yourself to eat more unprocessed, whole foods.
  2. Aim for 10K steps a day. Yes, we understand that many of you can barely fit 3K steps into your daily routines between your jobs, families, activities, and general schedule. However, there are many opportunities you can take to fit steps in, like take the stairs at work, taking a walk during your breaks, parking further away from the entrances if businesses, etc. If you want to achieve something, you’ll make it work.
  3. Try to be consistent with your hydration patterns by hitting 100oz of water each day of the challenge. Water is so beneficial on ANY diet, but it’s super helpful when you’re entering a deeper state of ketosis. Your coffee and electrolytes count as water too.

We will support you throughout the week by answering your questions and documenting what we do ourselves to reset for the Fall. Follow us on Instagram to watch for story updates, meal ideas, and live q&a sessions.

Before you start, take pictures, measurements, and weigh yourself. This will show you how small changes can make a difference. Make sure you plan ahead by making sure you have plenty of food and ingredient options that will nourish you this week and keep you satiated. Do not plan to wing it the morning of Day 1.

If you need a little TLC because you are new to keto or have never tracked total carbs, here is a sample meal plan with product links to get you through the week. Please note that these are suggestions and you can customize them to ensure success with your reset. If you need more meal ideas, search the #20gtotalreboot hashtag on Instagram to see past meals we have eaten during this type of reset.

We only share products/services that we love. This post contains affiliate links, which means we may receive a commission for purchases made through our links.

Keto 5 Day Meal Plan

To help get you started, here is a sample ketogenic diet meal plan:

Pro tips:
-skip breakfast if you are not hungry
-season your food with zero carb seasonings
-mix and match meals you like and don’t eat meals with foods you do not like
-drink a lot of water throughout the day

Monday

  • Breakfast: Bacon, 1/2 avocado, and eggs. 9G total carbs OR pumpkin spice bulletproof coffee 0G total carbs
  • Lunch: Chicken salad with celery sticks 3G total carbs
  • Dinner: Salmon with 1 cup asparagus cooked in butter. 5G total carbs

Tuesday

  • Breakfast: Egg, tomato, basil and goat cheese omelet. 3G total carbs
  • Lunch: Tuna salad with 1 cup cucumber slices. 4G total carbs
  • Dinner: Meatballs & Marinara with sautéed zucchini. 9G total carbs

Wednesday

  • Breakfast: Sausage, egg, and cheese sandwich. 1G total carbs
  • Lunch: BLT lettuce wraps and avocado. 9G total carbs
  • Dinner: Chicken Noodle-less Soup. 6G total carbs

Thursday

  • Breakfast: Omelet with avocado, salsa, peppers. 10G total carbs
  • Lunch: Ground taco meat with butter lettuce wraps and shredded cheese. 3G total carbs.
  • Dinner: Chicken stuffed with spinach and artichoke dip. 3G total carbs

Friday

  • Breakfast: Ham and cheese omelet. 2G total carbs
  • Lunch: Beef stir-fry cooked in avocado oil with broccoli. 6G total carbs
  • Dinner: Bun-less burger with bacon, egg and cheese. 1G total carbs

Bonus

Saturday

  • Breakfast: Sugar-free yogurt with peanut butter, cocoa powder and stevia. 5G total carbs
  • Lunch: Turkey and cheese slices with nuts. 5G total carbs
  • Dinner: Loaded cauliflower soup. 9G total carbs

Sunday

  • Breakfast: Fried eggs with bacon. 0G total carbs.
  • Lunch: Burger with salsa, cheese and guacamole. 5G total carbs
  • Dinner: Steak and hardboiled eggs with a side salad. 5G total carbs

0G-1G carb snacks:
seaweed crisps
pork rinds
pickles
-pepperoni chips
-olives
-hard boiled eggs
-cheese crisps
-beef sticks
bone broth
-deviled eggs
string cheese

0G carb sweets:
-stevia sweetened meringue cookies
-popsicles made with zero carb beverage powders
-sugar free jello
-cinnamon sweetener pork rinds
-stevia sweetened milk tea
-sugar free homemade gummy bears

Have wiggle room?
Choczero – use KETOBAES to save 10% off your order

DIY Mask Chain

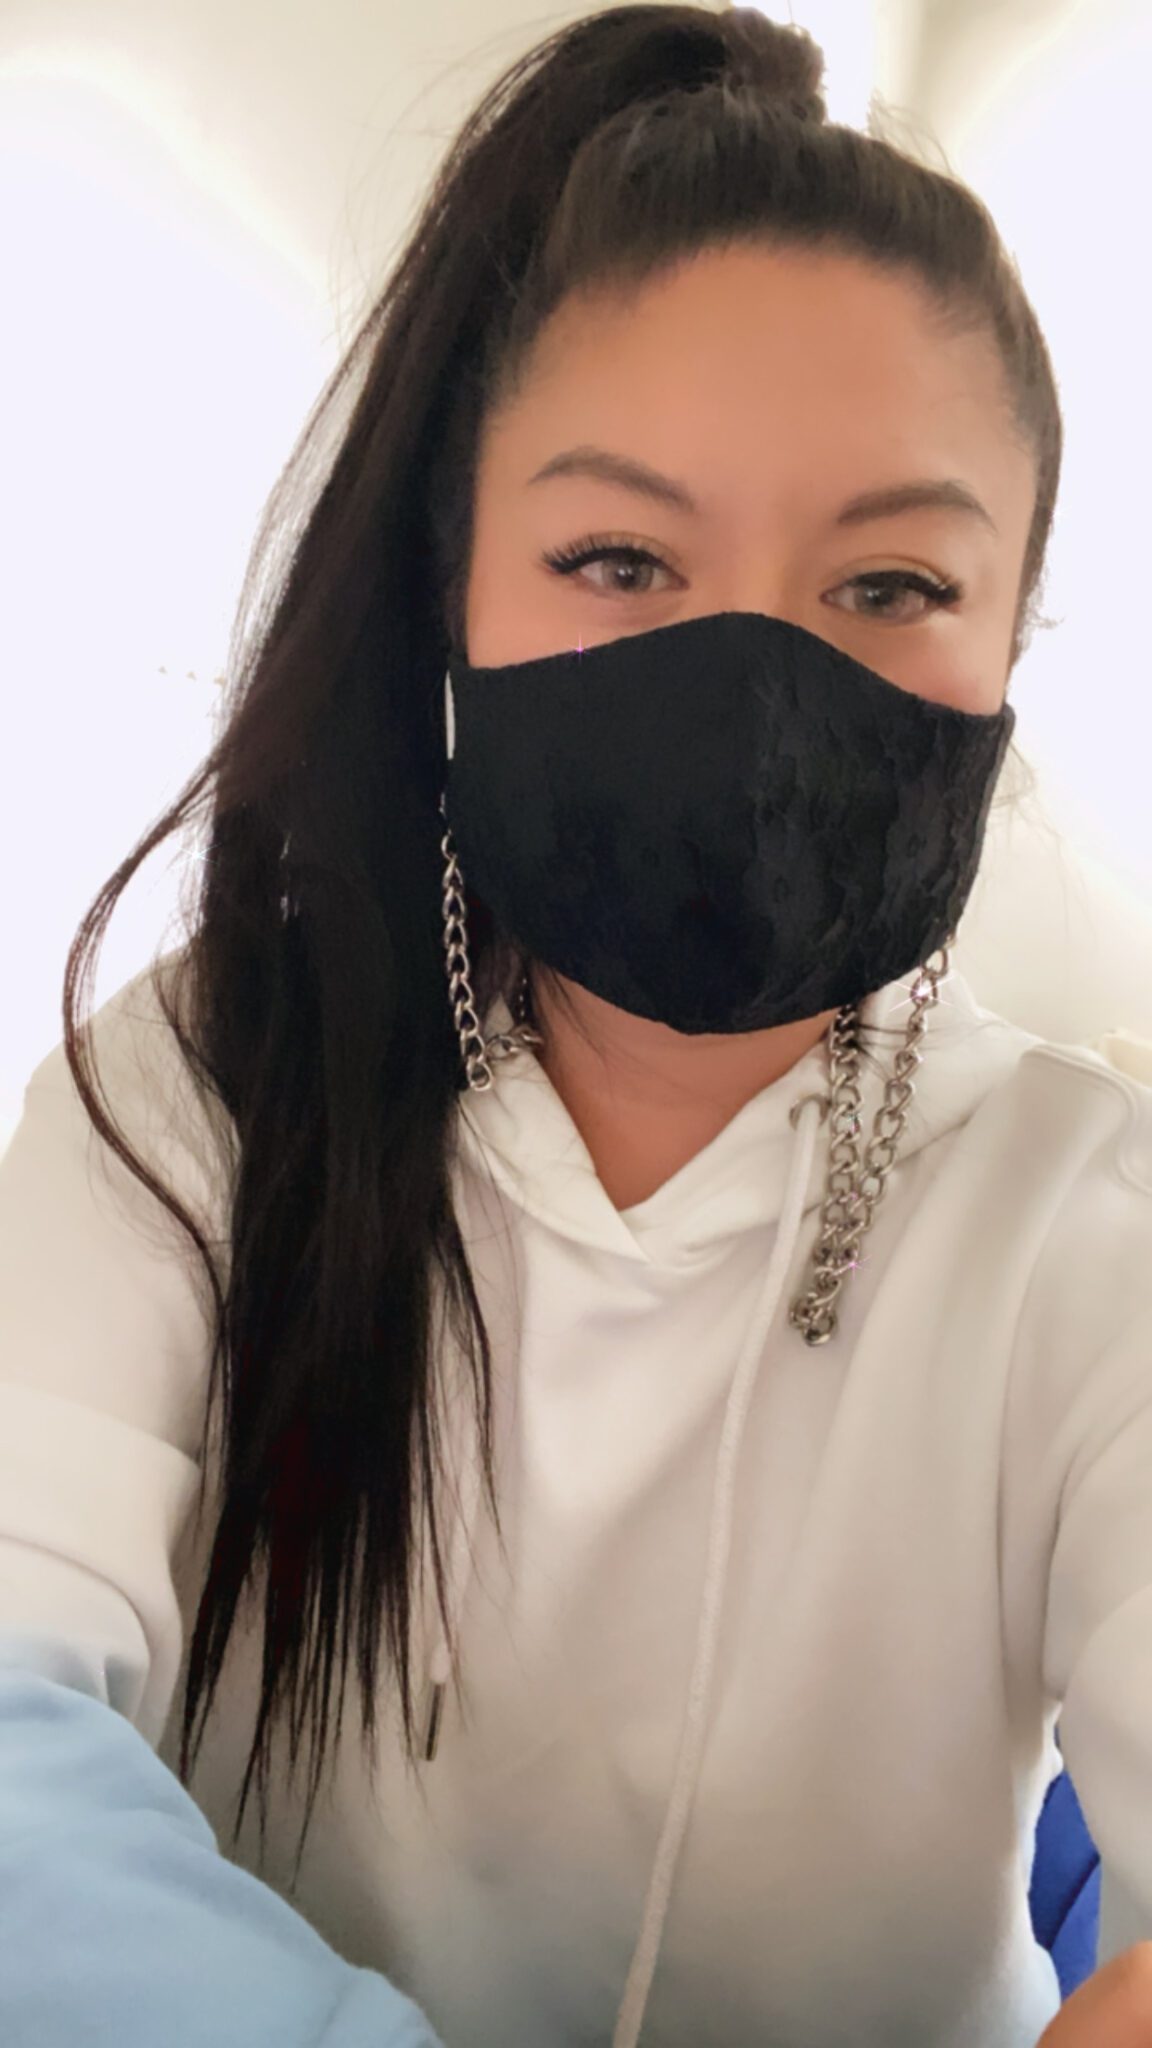
If you’re going to wear a mask – make it fashion. This one is also a functional solution for those of you run around a lot and find yourself taking your mask on and off between locations and activities. I personally love my mask chain because there have been so many instances when my mask has dropped to the ground when I eat or drink LOL.

I’ve been seeing a lot of articles about mask chains lately and after browsing several online shops and even purchasing a few on Amazon, I realized I could easily make my own.

To make your mask chain you need three things:

  1. Chain of choice. Craft stores carry a variety of chains in spools and individual styles. Look for them in the jewelry section.
  2. Lobster Clasp. Most chains will come with at least one, especially if you are using a necklace as your chain but you will need two for your mask.
  3. Split Rings. Think of these as adapters for your chains and lobster clasps. These connect the two seamlessly.
@theketodashians

##learnontiktok ##tiktokpartner ##GonnaKnow ##maskchain ##diymask ##staysafe

♬ POP SUMMER INSPIRATION – MikhailovMusic


Here are the steps to make your chain mask:

  1. Take a lobster clasp and connect it to a split ring.
  2. Connect the split ring with lobster clasp to each end of the chain.
  3. Clasp each end of the chain onto the ear loop of your mask.
  4. Happy social distancing and stay safe!

*pro-tip, if you have extra costume jewelry or chains in your vanity, this is a great way to give it new life.